-moz-box-shadow: 1px 1px 5px rgba(0, 0, 0, .1);
Showing posts with label future first lady. Show all posts

Saturday, November 22, 2014

How To Survive Finals


Finals time is upon finally upon us. *Insert collective groan from entire student population.* Every semester we know that finals will inevitably be here before we know it, but somehow we never seem to be prepared. In honor of finals coming up, here are a few tips to help you survive!

Music
Music is a huge part of studying for me. Personally I listen to film scores because they don't have distracting lyrics, but it also doesn't put me to sleep like classical music does. A great way to hear a bunch of awesome film scores is to listen to the Harry Potter film score radio on Pandora. Another station a lot of people like is the Hans Zimmer radio. No matter what I kind of music you like, I would definitely recommend something without lyrics or anything super distracting for intense studying!

Caffeinate and Snackinate
I totally made those words up, but don't forget to keep your body fueled! Of course coffee is the natural go-to (because caffeine, duh!), but don't forget to drink plenty of water as well! (I like to drink 2 bottles of water for every cup of coffee) and eat plenty of snacks, but don't forget to eat real meals as well!

Plan Plan Plan!
When it comes to finals time, planning is key! Plan out your study times and when you are going to study for each class. First, make sure you write down when and where every single one of your finals is. As well as writing everything in my planner, I also printed out a calendar to hang on my wall above my desk so I have it readily available. I like to plan to study an hour then take a ten or twenty minute break (to read My Life As Hayden, duh!). Make sure when you are studying to be completely off of social media! I've found that putting my phone across the room (on silent or vibrate) is the best way to not get distracted! Don't forget to study plenty in advance (aka NOT the night before!) your final!

Write in all of your due dates and finals so it's easily accessible!
Make Your Space
Whether you're working at your own desk or at the library, a clear work area is a must! Not only does it help keep you from being distracted, but it helps you feel more productive as well. I like to spread out all of my notes and other study materials because it helps me feel less cluttered (and ultimately more productive) and I like to be able to see everything at once. Make sure you have everything you need (pens, notes, computer, flash cards, post-it notes, etc.) before you start studying so you aren't constantly interrupting your study time.

Learn How To Study
Figure out how you study best and utilize it! For me, color coding and flash cards help me best. Flash cards are my go to study tool (try Quizlet if you are in a pinch and want to use online flashcards), but if I can't do flash cards, I love to rewrite my notes and color code them. There are some awesome study tips on Pinterest that I would definitely utilize!

Study Comfy
I am a huge believer in oversized tshirts and leggings. If I'm going to hunker down for some intense studying, I want to be as comfortable as possible. Please, avoid wearing your onesie to the library at all cost, but make sure you're not dying because you're in "real pants"!

The Day Of…
Dress for success! On the days I have tests I love to dress up (aka wear real pants and not a tshirt) because it makes me feel like I have my crap together. There's nothing like walking into an 8 am exam looking -and feeling- super confident even though you stayed up until 3 the night before studying. "Dressing up" always puts me in a "YOU GO GLEN COCO" state of mind, which I think results in better test results!
When it comes to studying the day of the test, don't. Yes, you heard me right! In my first semester of college, my calculus professor told us "Cram, cram, cram the night before if you need to, but on the day of the test, take it easy. I wouldn't even open the book!" Now while I don't intensely study the day of an exam if I can help it, I do review the test material. Usually I'll make flashcards or an outline of important topics and quiz myself. In doing this, you are calmly going over the test material without the added stress of cramming the day of. Just relax, and you'll be in a better frame of mind for taking the test!

Stay hydrated in the cutest way possible…with a Future First Lady koozie!
Don't forget to reward yourself after studying, either! Head over to Future First Lady and get 10% off your purchase with the code HaydenL. Finals only come once a semester, it's totally ok to treat yourself with some retail therapy ;)

Wednesday, June 25, 2014

Red, White, and Better Than You


I made this 1/2 gallon cooler for a sweet friend of mine. I've had a couple of people ask me how to paint a cooler jug, so I've decided to make this post very detailed. I tried to take pictures of every step (but I did forget to take a few pics of some steps, so bare with me!).

The first thing to do is go buy a cooler jug (duhhhhh!). This was one that I have had for a while and I've been meaning to paint. Look for a cooler jug with a relatively smooth surface, and as little grooves and indentions as possible. (This one didn't meet the qualifications very well, but I already had it. So, oh well.)
When I get the cooler home, the first thing I do is wash it so as soon as I get it painted it's ready to use.
After it's washed, tape off the top with painter's tape or masking tape. This keeps all the dust from sanding, spray paint, and just gunk out of it.
Sand the cooler. I usually start out with a coarser grit (about 60) to get off the finish, then sand with a finer grit (about 220) to smooth is out. I forgot to take a picture of it before I primed it to show what it should look like. YOU HAVE TO SAND THE COOLER!!! Even if your primer says "No Sanding Required", the paint will peel right off! (Believe me, I know firsthand.) Plus, it literally takes no more that 15 minutes!
PRIME! PRIME! PRIME! This is important because this is the foundation for all of your hard work. Make sure you use a spray paint made for PLASTIC! I normally use the Krylon Fusion for plastic, but I ran out and picked up some of the Valspar Premium that bonds to plastic. Both worked well for me.
The two sprays I used as primer.
What your cooler should look like primed.

Now the fun begins! You can start painting the details. Start by deciding what you want to paint. I knew I wanted to make this cooler America themed because my friend LOVES America! 
I decided to do a Chevron background, which proved harder than it seemed. I tried to tape on a chevron design, look for chevron painters tape (which I found on Pinterest, but was sold out every where locally.), tried Pinterest tips, and everything! My problem lied in the fact that the cooler was completely circular. I ended up buying chevron scrapbook paper and cutting out a template and taping it on, then stenciling it out.
After I cut out a template from the scrapbook paper, I taped it on using painter's tape. Make sure everything is lined up correctly and evenly! Then,  I used a pencil to trace the design.
I put a painter's tape in the stripes that were going to stay white so I wouldn't accidentally paint something the wrong color. (Thanks for the idea Pinterest!)
After I painted the red chevron, I added a gold stripe on the tops and bottoms of the stripes with a metallic gold paint pen to make the lines look more crisp and clean.
I did a layer of ModPodge over the chevron so it would not get messed up. TIP: If you do a layer of ModPodge before you do anything detailed, it is easier to fix mistakes. The ModPodge acts as a sealer over the previous layer of paint, making it a lot easier to clean up mistakes without messing up all of your hard work!

My friend is from Texas, and we go to school in Alabama, so putting the states on the cooler was a no brainer! I put hearts over her hometown and our school, and also put a cross over where she is a camp counselor. 
Deep in the heart of Texas...

Go Trojans!!

To put the outline of the states on the cooler, I traced the image onto a tissue paper. Next, I placed the tissue paper on the cooler where I wanted it, then I used a fine tip black Sharpie to trace the outline. The Sharpie will bleed through the paper and leave an outline that you can paint over. 


I also put a saying from Future First Lady that says "Red, White, and Better Than You".

I used the same process for outlining the states. I freehanded this, but check out daFont.com for cool free fonts!

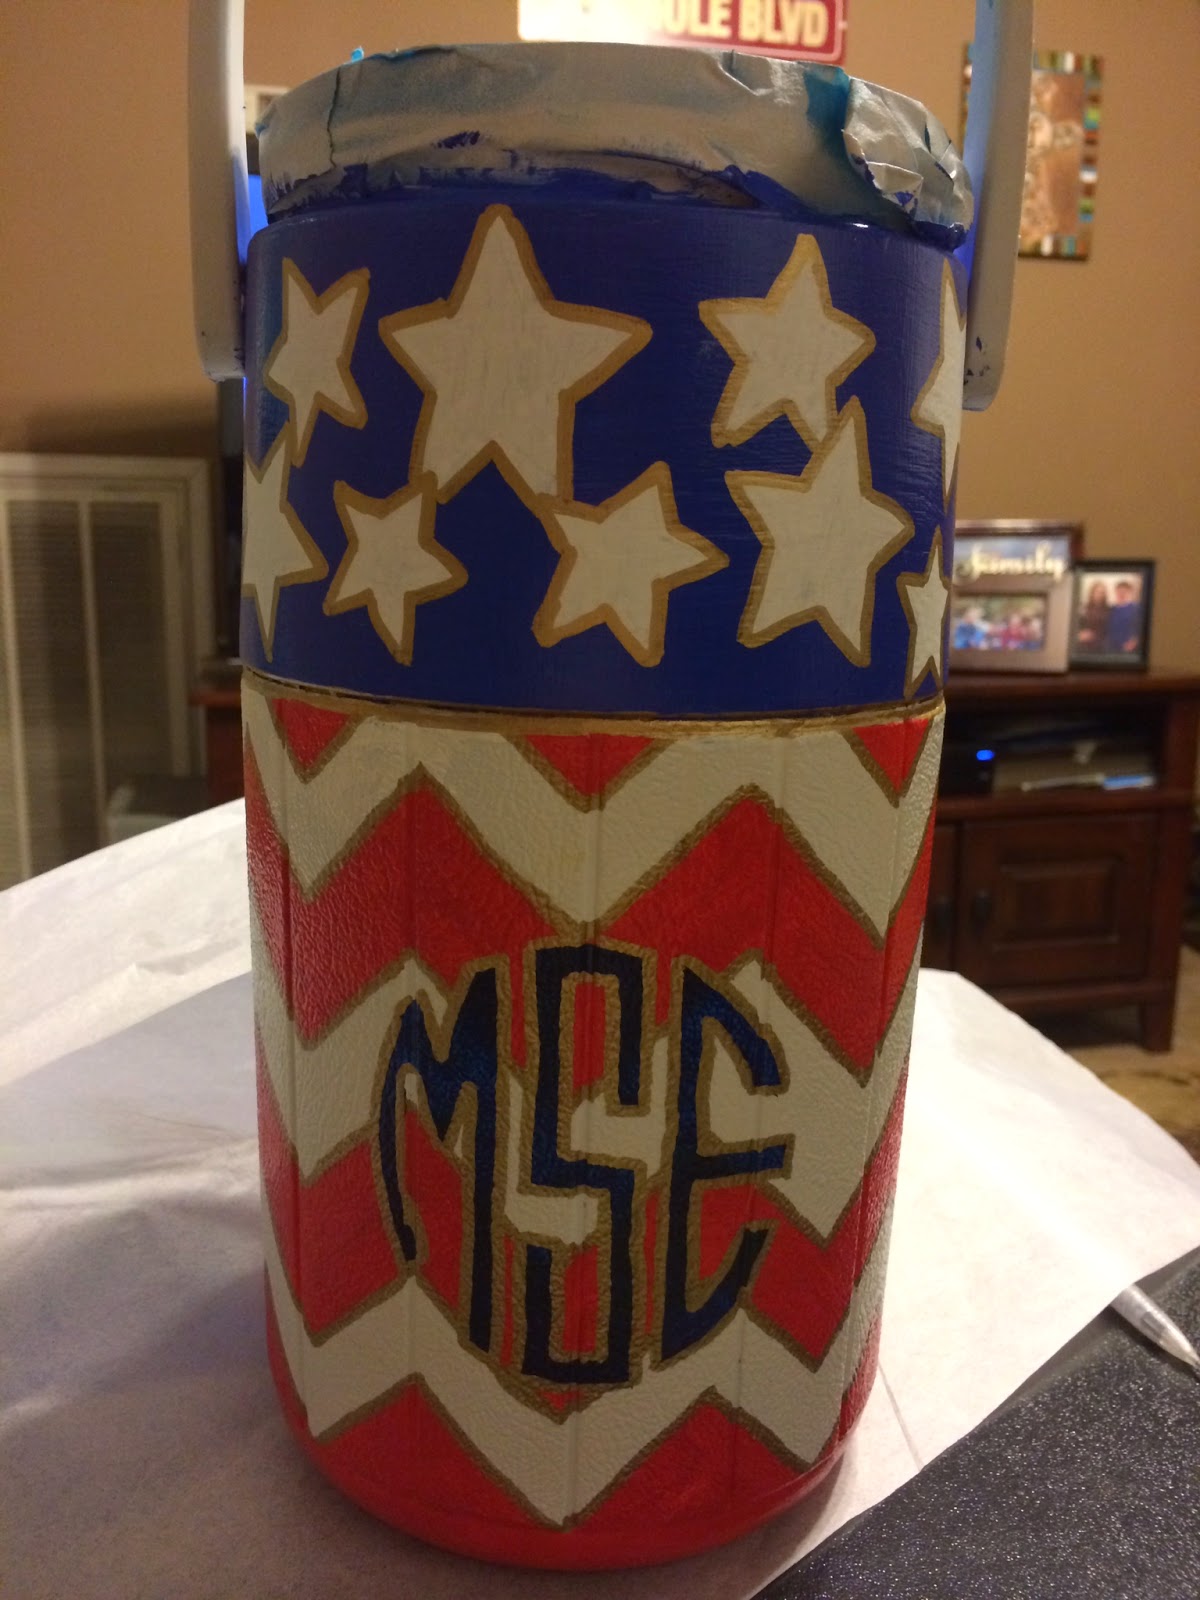
For the front, I decided to put her monogram, because, DUH!
Same process because it's super easy!
Final result!


The overall goal was for the cooler to mimic a flag, so I painted to top portion blue with white stars.


Add any decorations. This can be rhinestones, glitter, etc. I puts bows that I got for $1 a piece at Wal-Mart on both sides of the handle. 

SEAL! First, I do 2 or 3 layers of Mod Podge, then I use a spray sealant. Make sure the Mod Podge is COMPLETELY dry before you use the final sealant or you will end up with a mess!! I tried this Rustoleum sealant that someone suggested, but I wasn't a huge fan of it. I guess I am going to have to break down and buy the MinWax Polycrylic to dry.
ModPodge goes on white, but dries clear! I use at least two coats before I do the final seal.
The final sealant I used. I sprayed two coats.


The final step is to WOW everyone with your awesome crafting skills! And post it to The Cooler Connection on Facebook!

The final result! Can't wait for my friend to get it! P.S. It only costs $6.85 to ship this cooler jug from AL to TX!