I made this 1/2 gallon cooler for a sweet friend of
mine. I've had a couple of people ask me how to paint a cooler jug, so I've
decided to make this post very detailed. I tried to take pictures of every step
(but I did forget to take a few pics of some steps, so bare with me!).
The first thing to do is go buy a cooler jug
(duhhhhh!). This was one that I have had for a while and I've been meaning to
paint. Look for a cooler jug with a relatively smooth surface, and as little
grooves and indentions as possible. (This one didn't meet the qualifications
very well, but I already had it. So, oh well.)
When I get the cooler home, the first thing I do is
wash it so as soon as I get it painted it's ready to use.
After it's washed, tape off the top with painter's
tape or masking tape. This keeps all the dust from sanding, spray paint, and
just gunk out of it.
Sand the cooler. I usually start out with a coarser
grit (about 60) to get off the finish, then sand with a finer grit (about 220)
to smooth is out. I forgot to take a picture of it before I primed it to show
what it should look like. YOU HAVE TO SAND THE COOLER!!! Even if your primer says
"No Sanding Required", the paint will peel right off! (Believe me, I
know firsthand.) Plus, it literally takes no more that 15 minutes!
PRIME! PRIME! PRIME!
This is important because this is the foundation for all of your hard work.
Make sure you use a spray paint made for PLASTIC! I normally use the Krylon
Fusion for plastic, but I ran out and picked up some of the Valspar Premium
that bonds to plastic. Both worked well for me.
The two sprays I used as primer.
What your cooler should look like primed.
Now the fun begins! You can start painting the
details. Start by deciding what you want to paint. I knew I wanted to make this
cooler America themed because my friend LOVES America!
I
decided to do a Chevron background, which proved harder than it seemed. I tried
to tape on a chevron design, look for chevron painters tape (which I
found on Pinterest, but was sold out every where
locally.), tried Pinterest tips, and everything! My problem lied in the fact
that the cooler was completely circular. I ended up buying chevron scrapbook
paper and cutting out a template and taping it on, then stenciling it out.
After I cut out a template from the scrapbook paper, I taped it on using painter's tape. Make sure everything is lined up correctly and evenly! Then, I used a pencil to trace the design.
I put a painter's tape in the stripes that were going to stay white so I wouldn't accidentally paint something the wrong color. (Thanks for the idea Pinterest!)
After I painted the red chevron, I added a gold stripe on the tops and bottoms of the stripes with a metallic gold paint pen to make the lines look more crisp and clean.
I did a layer of ModPodge over the chevron so it would not get messed up. TIP: If you do a layer of ModPodge before you do anything detailed, it is easier to fix mistakes. The ModPodge acts as a sealer over the previous layer of paint, making it a lot easier to clean up mistakes without messing up all of your hard work!
My
friend is from Texas, and we go to school in Alabama, so putting the states on
the cooler was a no brainer! I put hearts over her hometown and our school, and
also put a cross over where she is a camp counselor.
Deep in the heart of Texas...
Go Trojans!!
To put the outline of the states on the cooler, I traced the image onto a tissue paper. Next, I placed the tissue paper on the cooler where I wanted it, then I used a fine tip black Sharpie to trace the outline. The Sharpie will bleed through the paper and leave an outline that you can paint over.
I also put a saying from Future First
Lady that says "Red, White, and Better Than You".
I used the same process for outlining the states. I freehanded this, but check out daFont.com for cool free fonts!
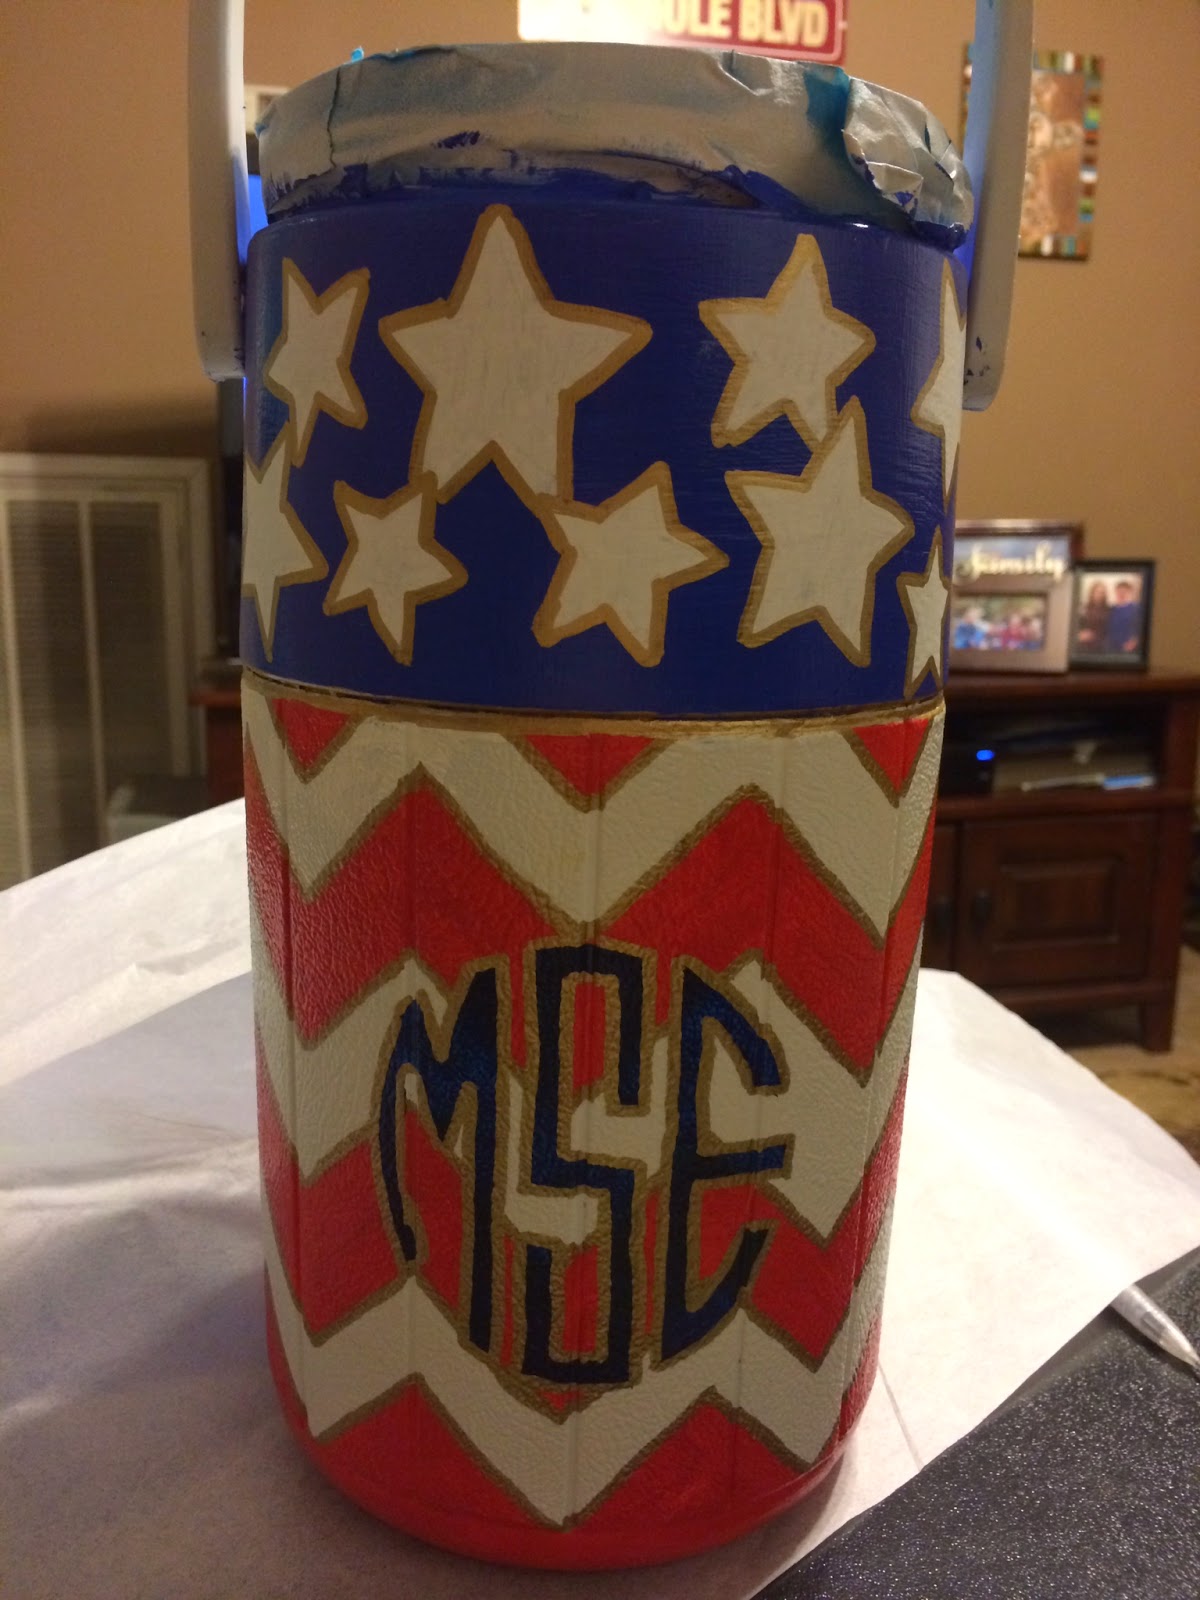
For
the front, I decided to put her monogram, because, DUH!
Same process because it's super easy!
Final result!
The overall goal was
for the cooler to mimic a flag, so I painted to top portion blue with white
stars.
Add any decorations. This can be rhinestones, glitter, etc. I puts
bows that I got for $1 a piece at Wal-Mart on both sides of the
handle.
SEAL! First, I do 2 or 3 layers of Mod Podge, then I use a spray
sealant. Make sure the Mod Podge is COMPLETELY dry before you use the final
sealant or you will end up with a mess!! I tried this Rustoleum sealant that
someone suggested, but I wasn't a huge fan of it. I guess I am going to have to
break down and buy the MinWax Polycrylic to dry.
ModPodge goes on white, but dries clear! I use at least two coats before I do the final seal.
The final sealant I used. I sprayed two coats.
The final step is to WOW
everyone with your awesome crafting skills! And post it to The Cooler Connection on Facebook!
The final result! Can't wait for my friend to get it! P.S. It only costs $6.85 to ship this cooler jug from AL to TX!